Why is flash drive not recognised on Mac
There are several reasons why your Mac isn’t detecting your flash drive, and these factors can range from software to hardware-related problems. Some common explanations include:
- You have a damaged USB port.
- Your flash drive isn’t recognised by your Mac because of certain settings.
- Insufficient power is getting to your flash drive—this usually occurs if you use a bus-powered USB hub and have multiple devices connected.
- You didn’t correctly eject a previously connected drive.
- Your macOS needs an update.
How to fix USB not showing up on Mac
If your USB drive not detected, try these methods:
- Verify the power, port, and cable connections: Ensure that the USB device is powered on and its cables are securely connected.
- Inspect for any missing software: Confirm that you’ve installed the most recent software for your device and visit the manufacturer’s website for any available updates.
- Examine the USB hub: If the device is connected to a USB hub, double-check its functionality.
Don’t panic if your USB drive isn’t showing. It may be in full working order and more of an issue with some of your system settings. Try our solutions below to help solve your issue.
- Restart your Mac
- Connect a flash drive to another USB port
- Change Finder settings
- Use First Aid to repair a flash drive
- Use the Terminal to fix the issue
- Update macOS
- Format the USB drive
- Send the USB drive to the repair centre
1. Restart your Mac
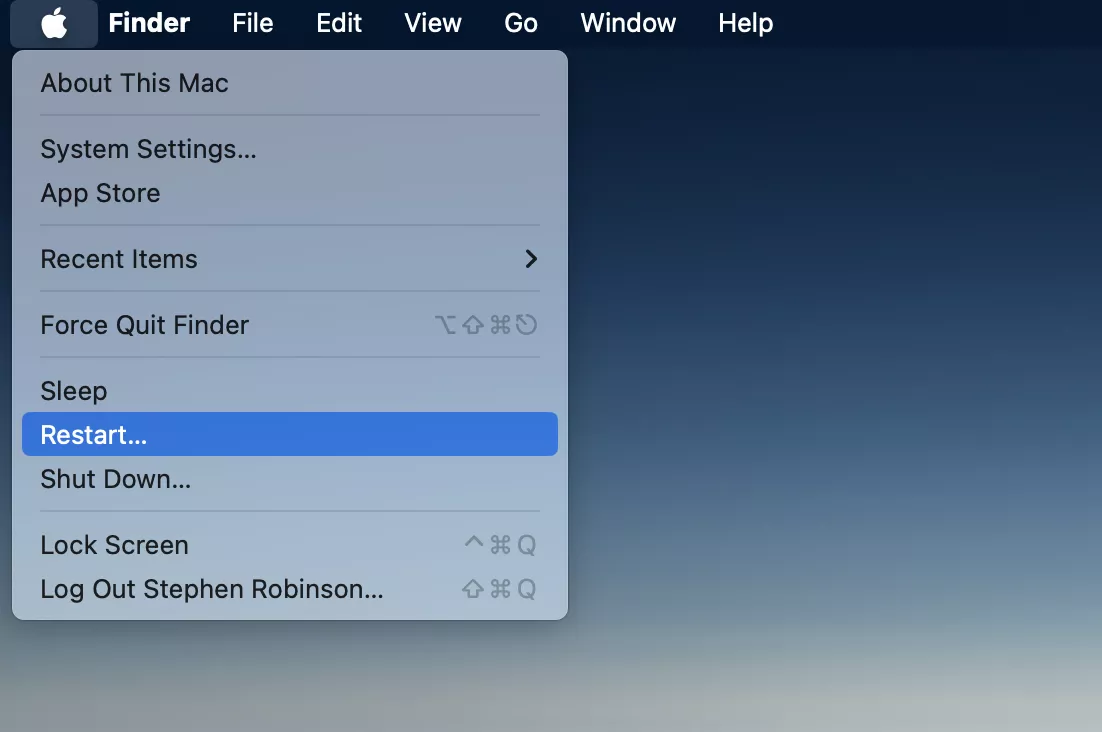
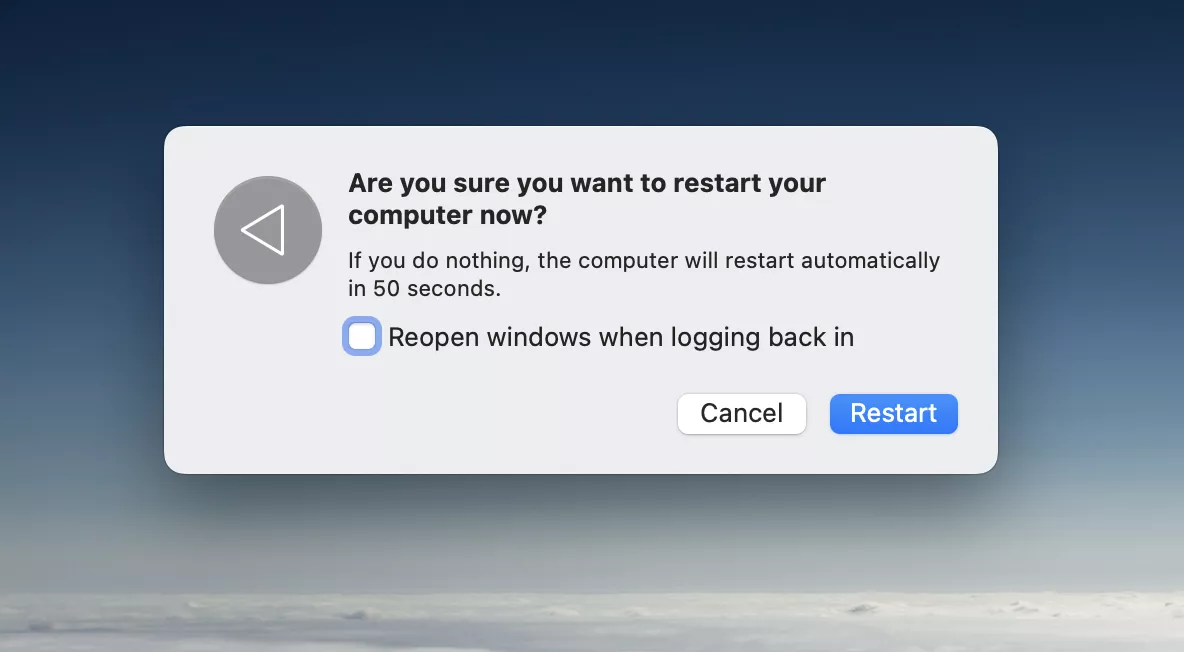
Restarting your Mac is often the go-to solution for various issues, including an undetected USB flash drive. To do it:
- Unplug your flash drive, then click the Apple icon in the top-left corner of the menu bar and select the Restart option.
- Click Restart to confirm.
- Wait for your Mac to restart.
- Open Terminal:
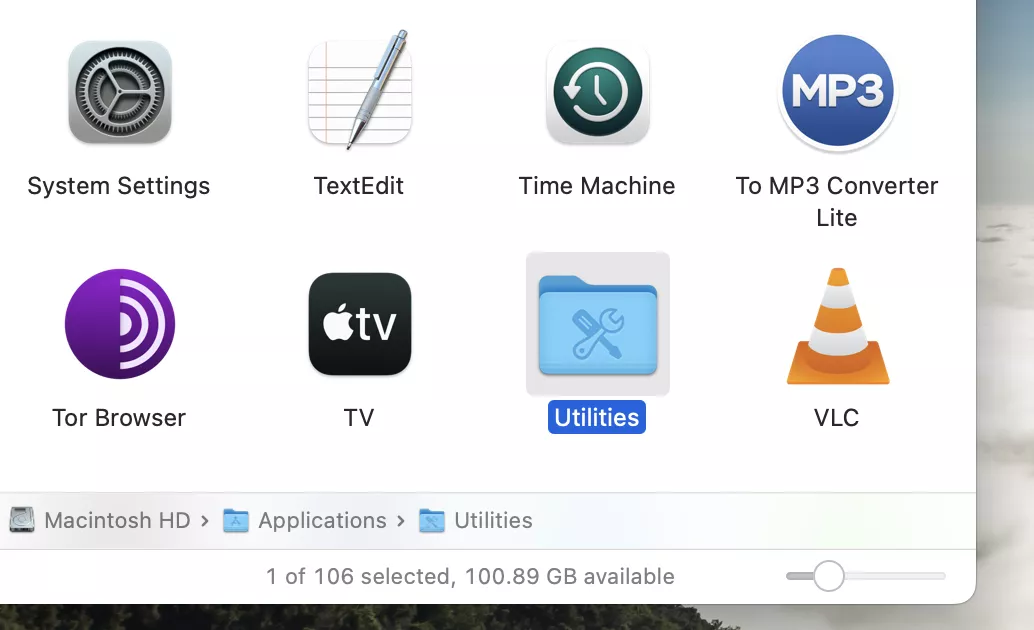
- Go to Finder and navigate to Applications. Open the Utilities folder and click on Terminal to open it.
Alternatively, you can use Spotlight Search by pressing Cmd + Space, typing “Terminal,” and hitting Enter.
- Once your Mac is back on, plug your flash drive back in and see if it appears. If this doesn’t resolve your issue, please read on for further solutions.
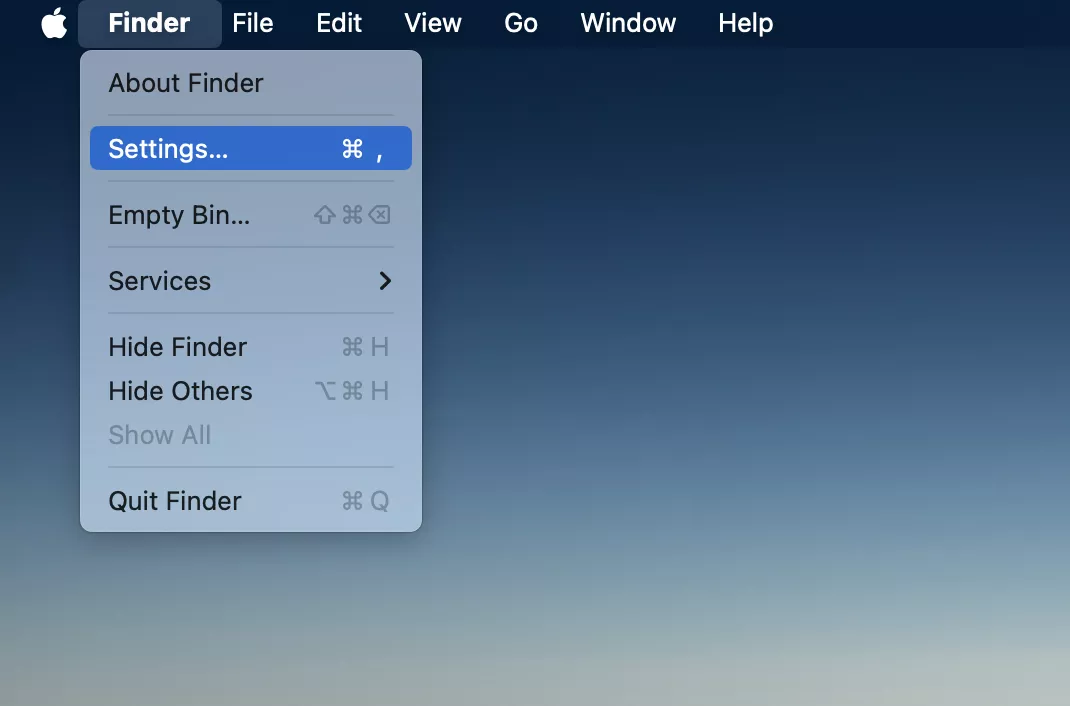
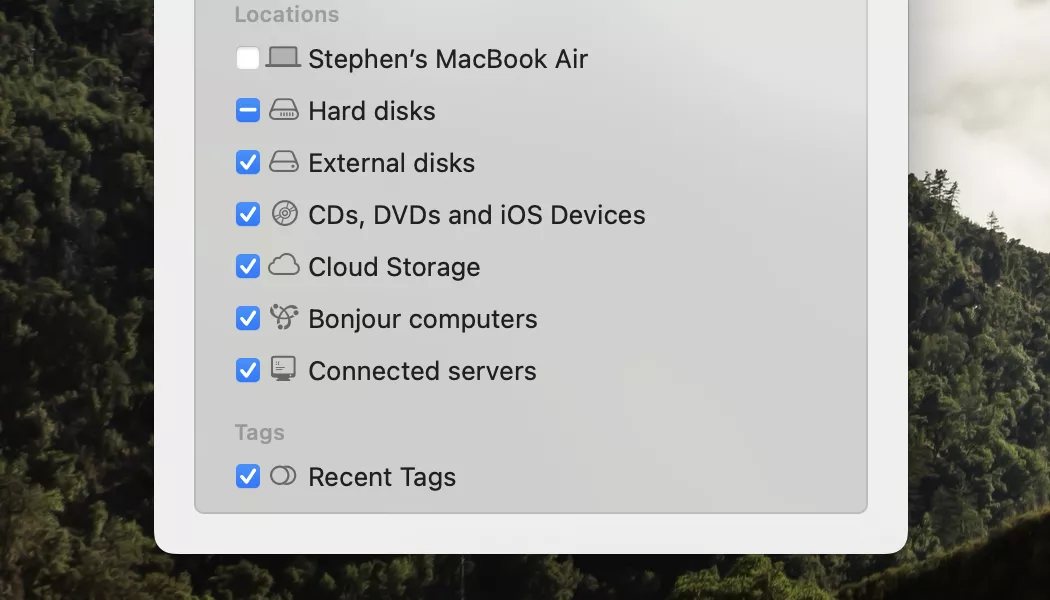
- Open Finder and click Finder in the menu bar.
- Click Settings/Preferences.
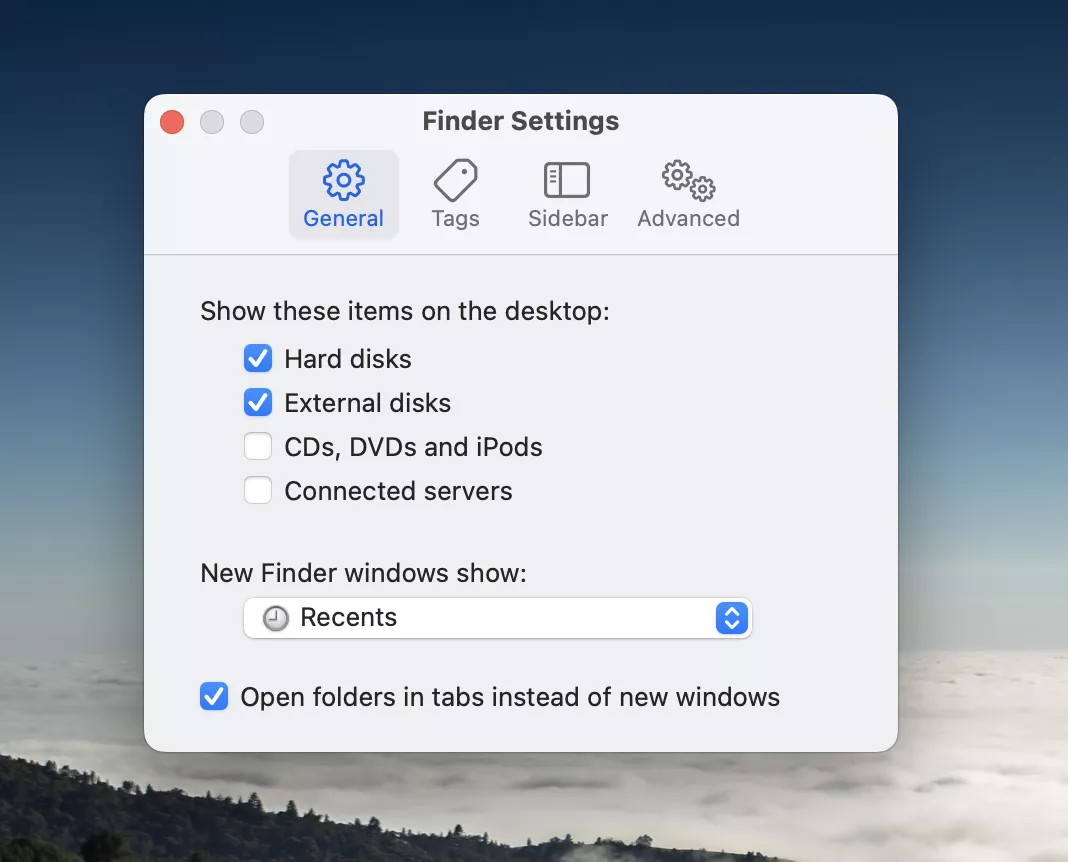
- Choose the General tab and ensure the External disks option is checked.
- Head to the Sidebar tab and verify that the External disks option is selected.
- Close the Preferences window.
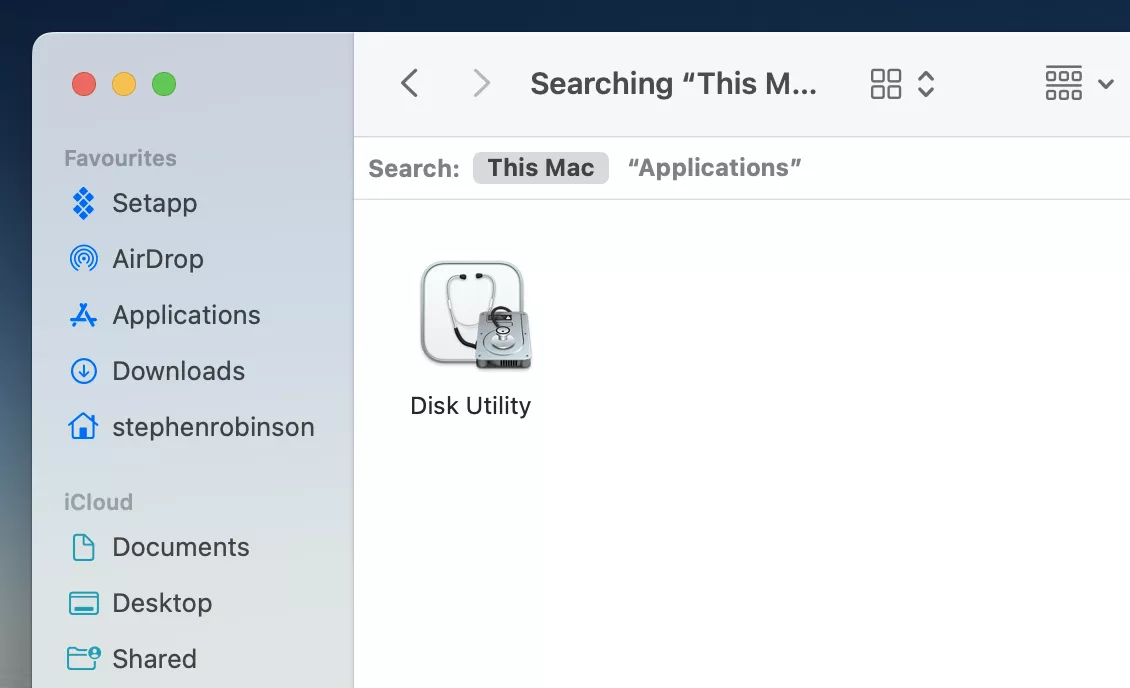
- Open Finder, then go to the Applications directory, and choose Disk Utility.
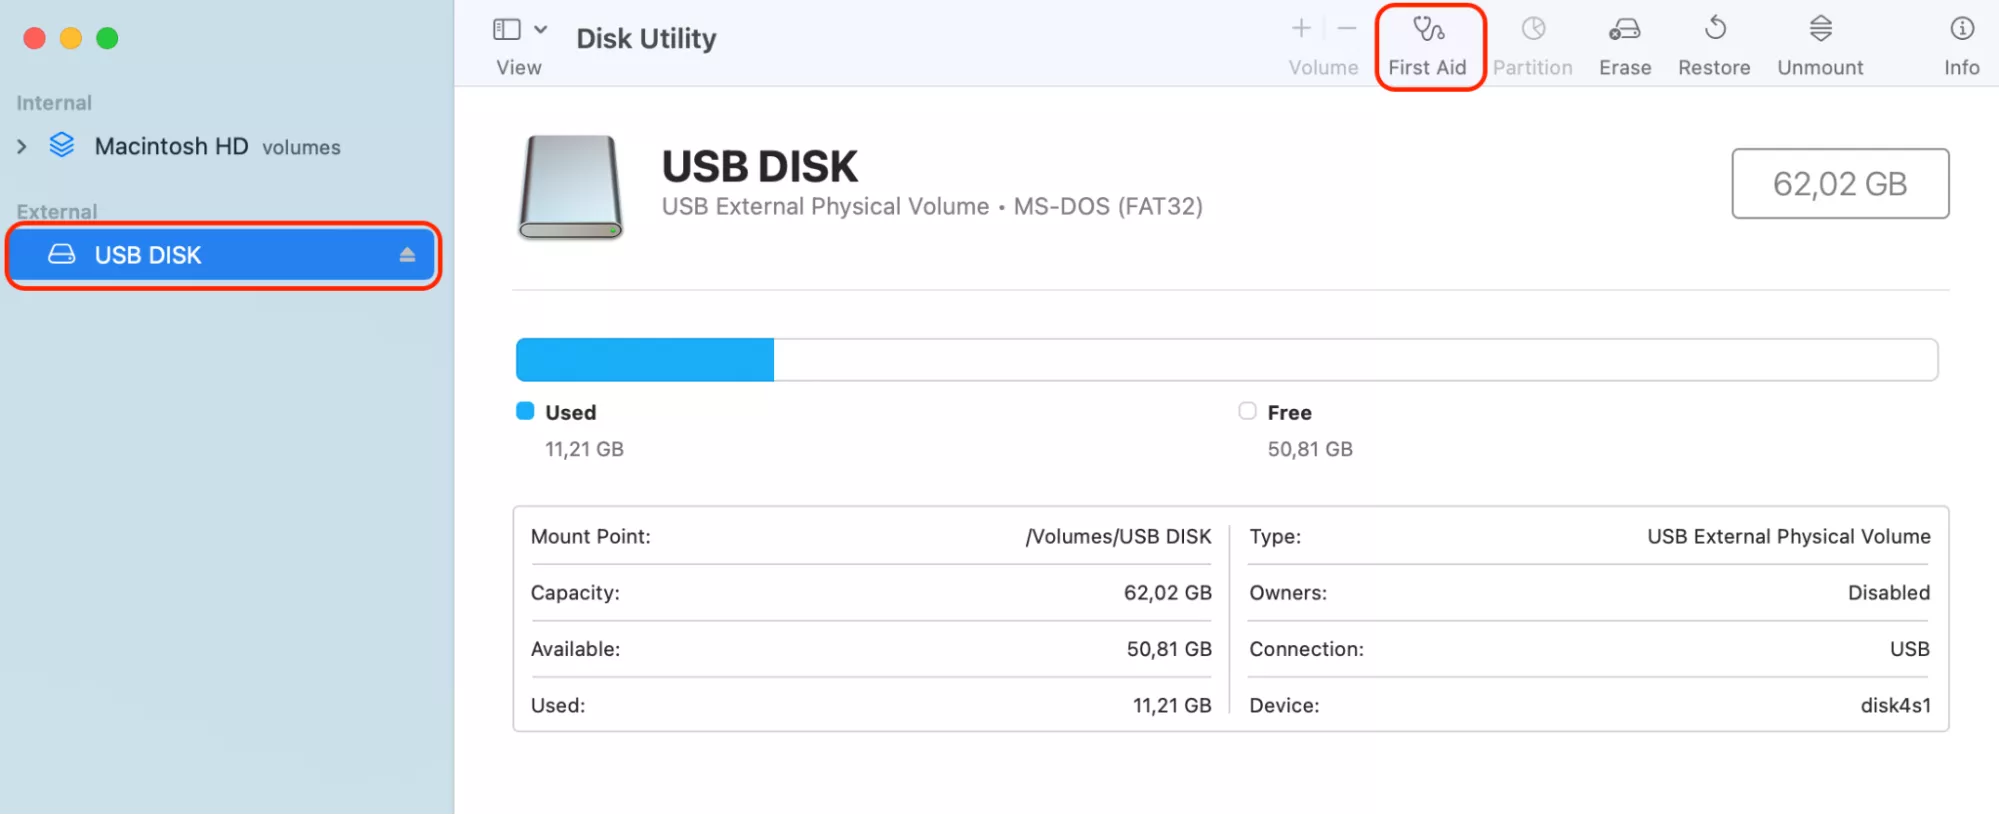
- Select your USB flash drive from the list of available storage devices on the left.
- Access the First Aid option in the toolbar by clicking on it.
- Confirm that you wish to perform an error check on the USB flash drive by clicking the Run button.
- Open the Finder window, choose Applications, and then open the Utilities folder.
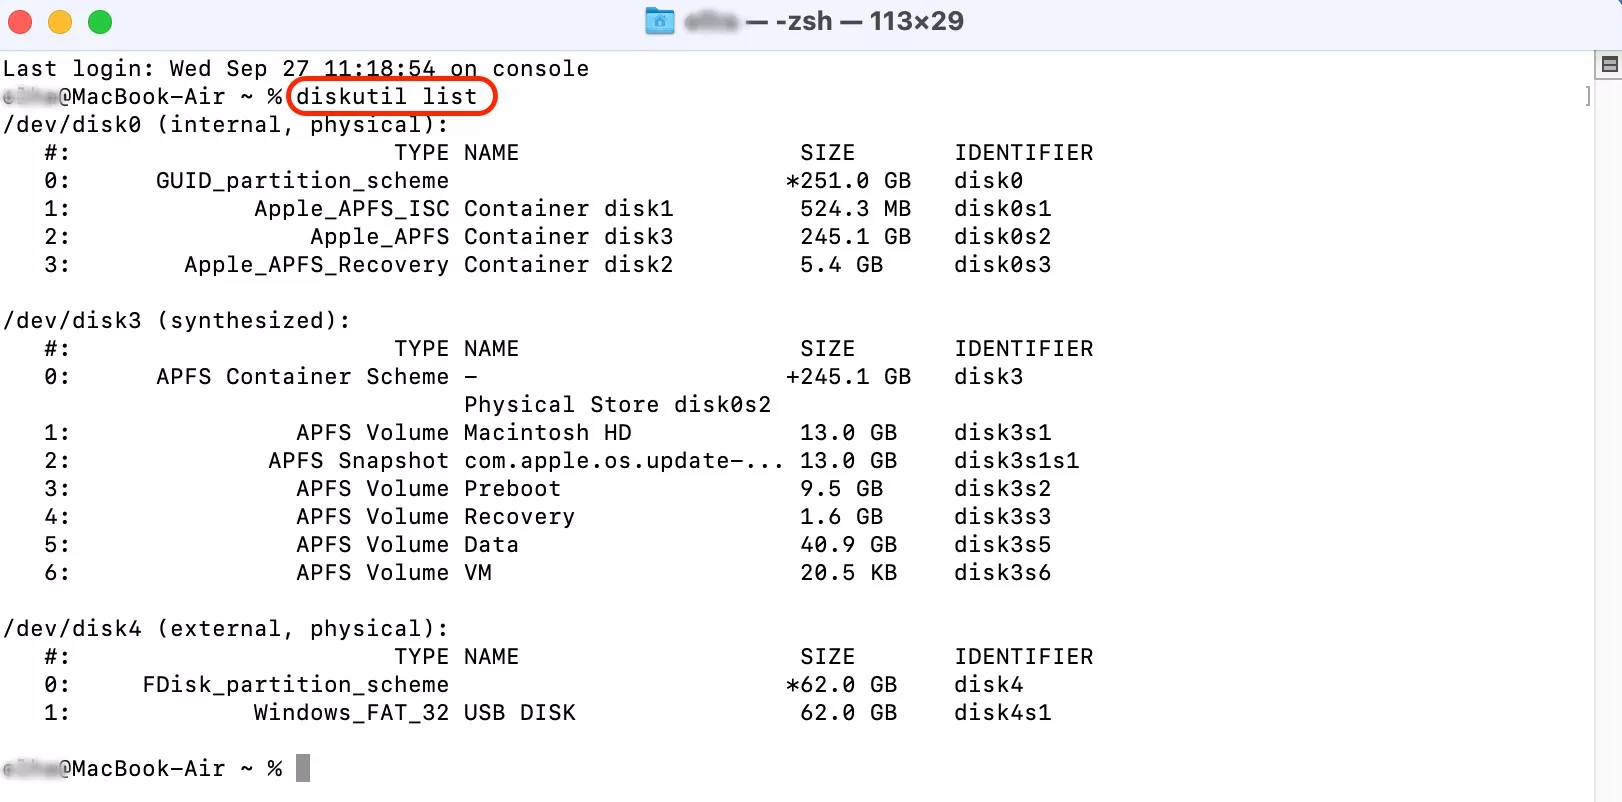
- In the Utilities folder, find Terminal, open it, and type diskutil list followed by the Return button.
- Find the disk number of your USB flash drive, type diskutil info disk2, and press Return. Instead of number 2, at the end of the command, indicate the disc number of your USB drive.
- Now type diskutil eject disk 2, and hit the Return button.
- Then type diskutil list followed by Return. When your USB drive vanishes from the Terminal list, proceed to close the Terminal window.
- Open Console to examine the presence of drive errors.
- Select Errors and Faults to find any errors.
- Reconnect your USB flash drive to your Apple computer again. If no error appears, your USB flash drive now works well.
- Start with the Apple logo in the top left of your desktop.
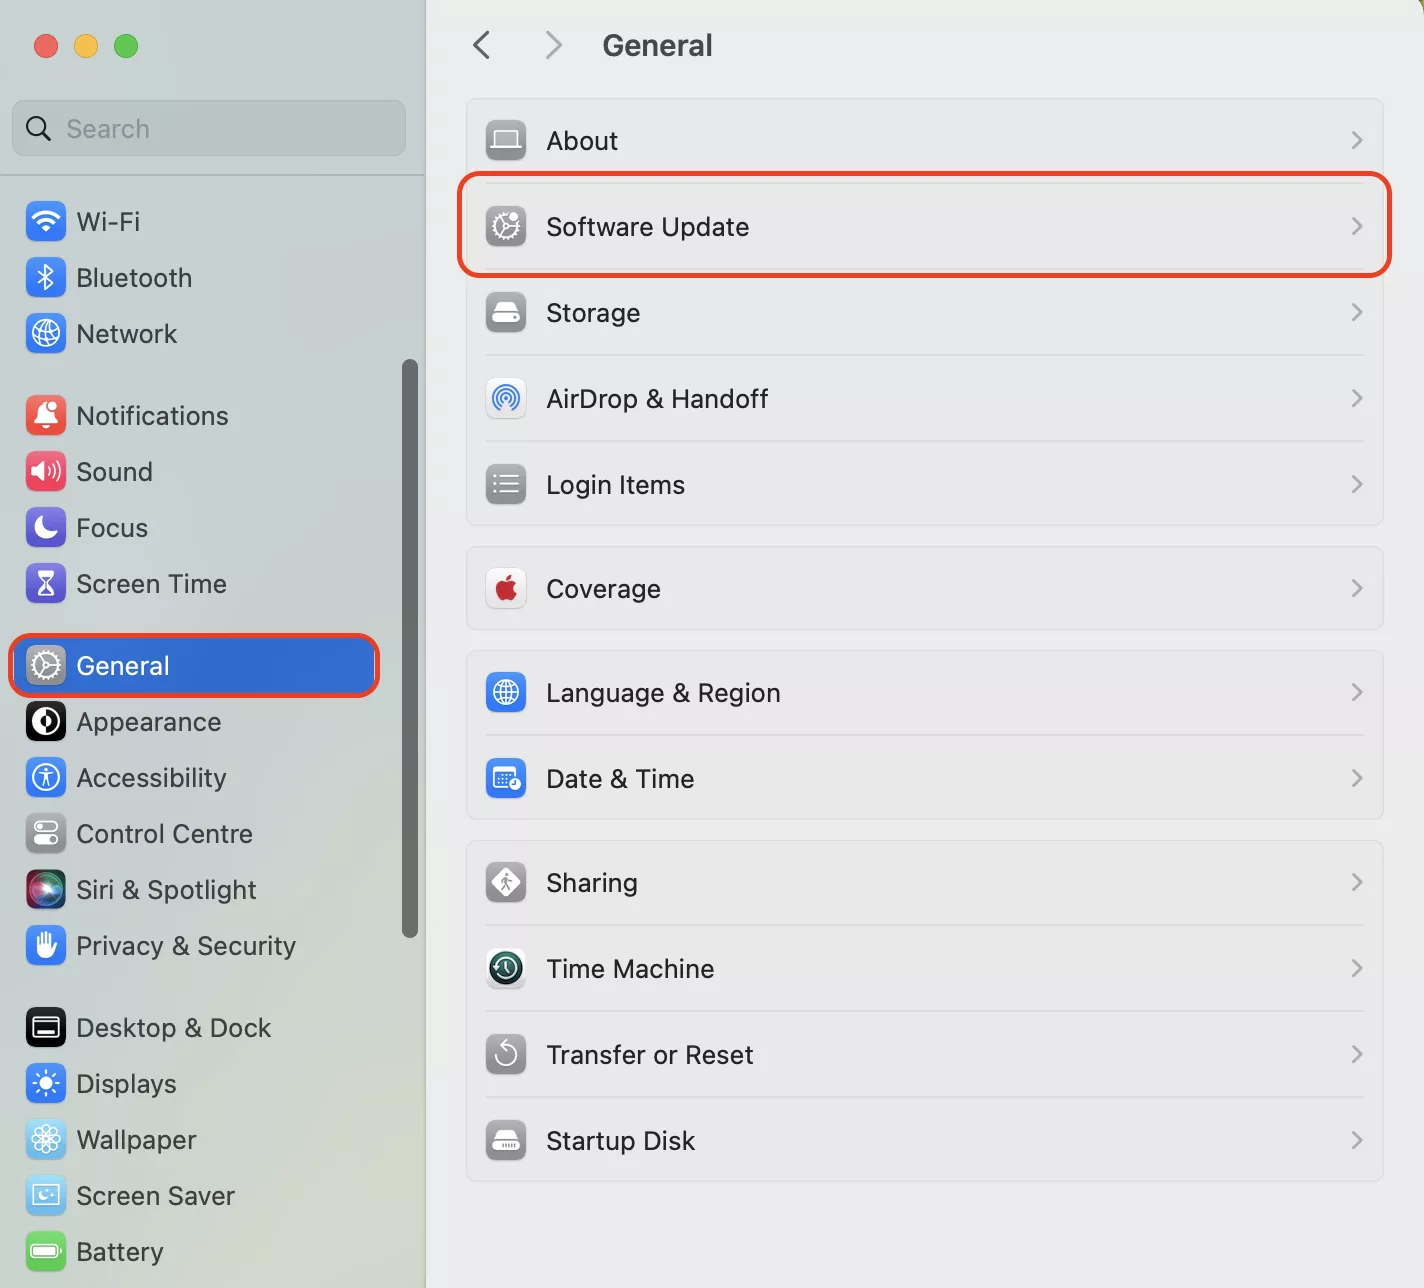
- Click System Settings.
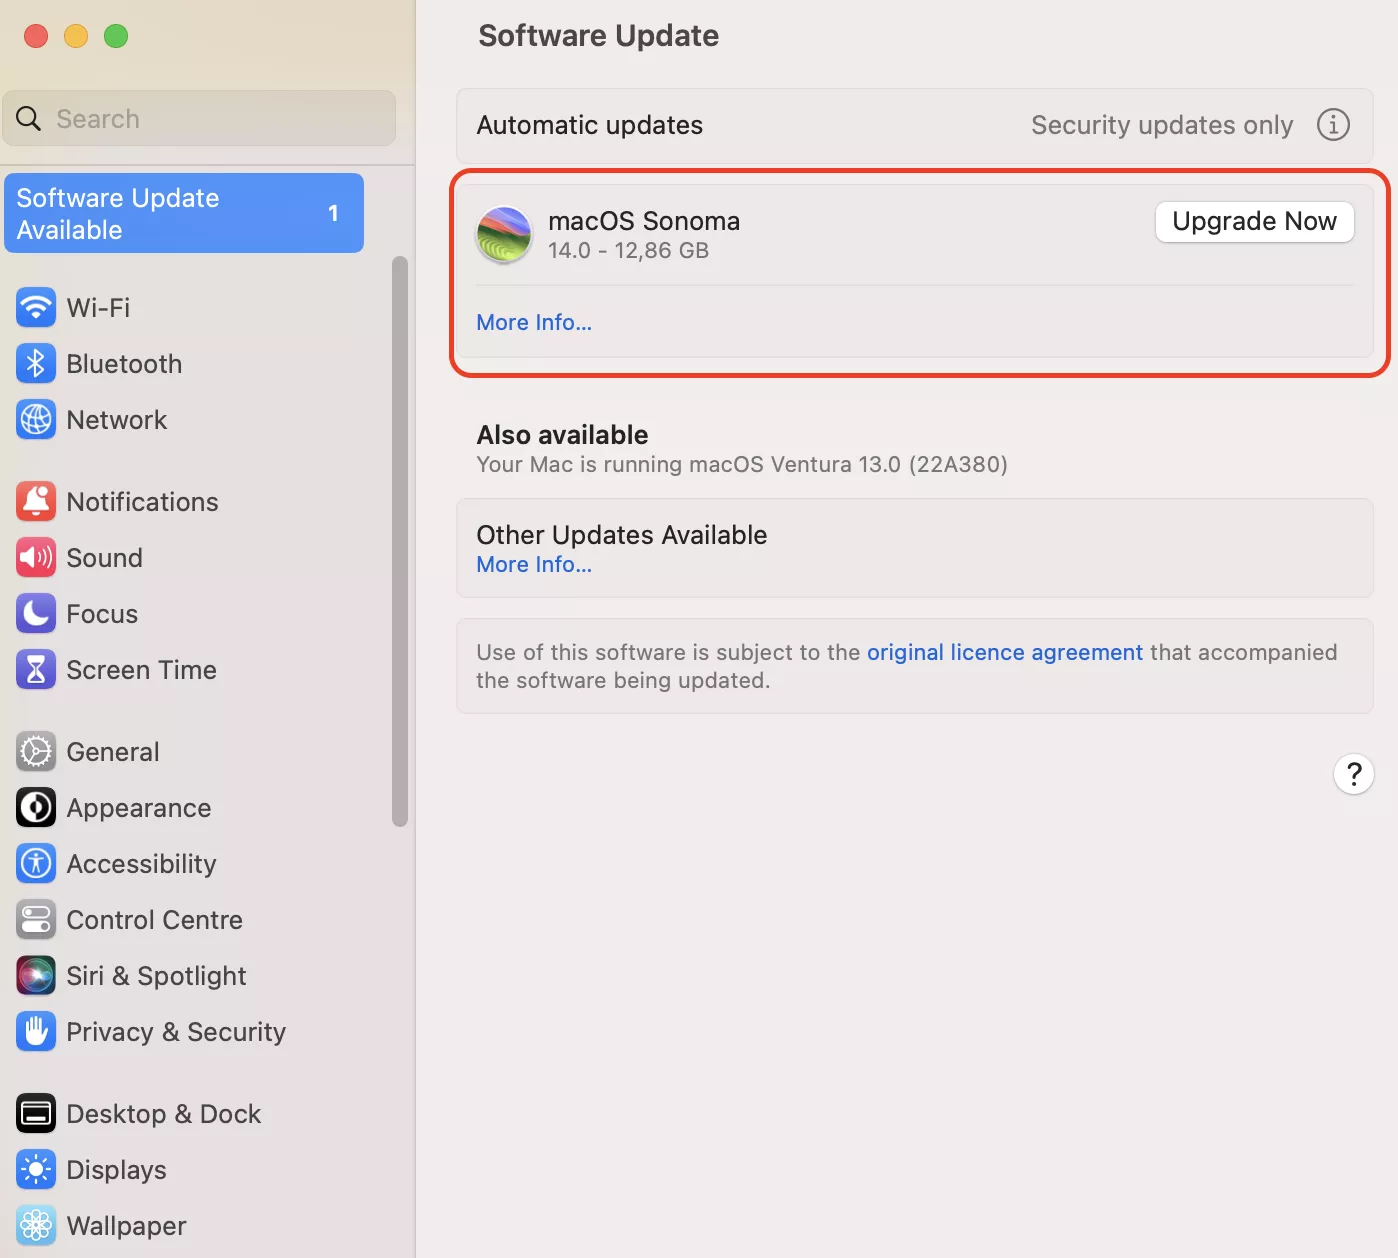
- Now click General on the left side panel and then Software Update.
- Select Upgrade Now and wait for this to complete. You may be asked to download the update if this is available.
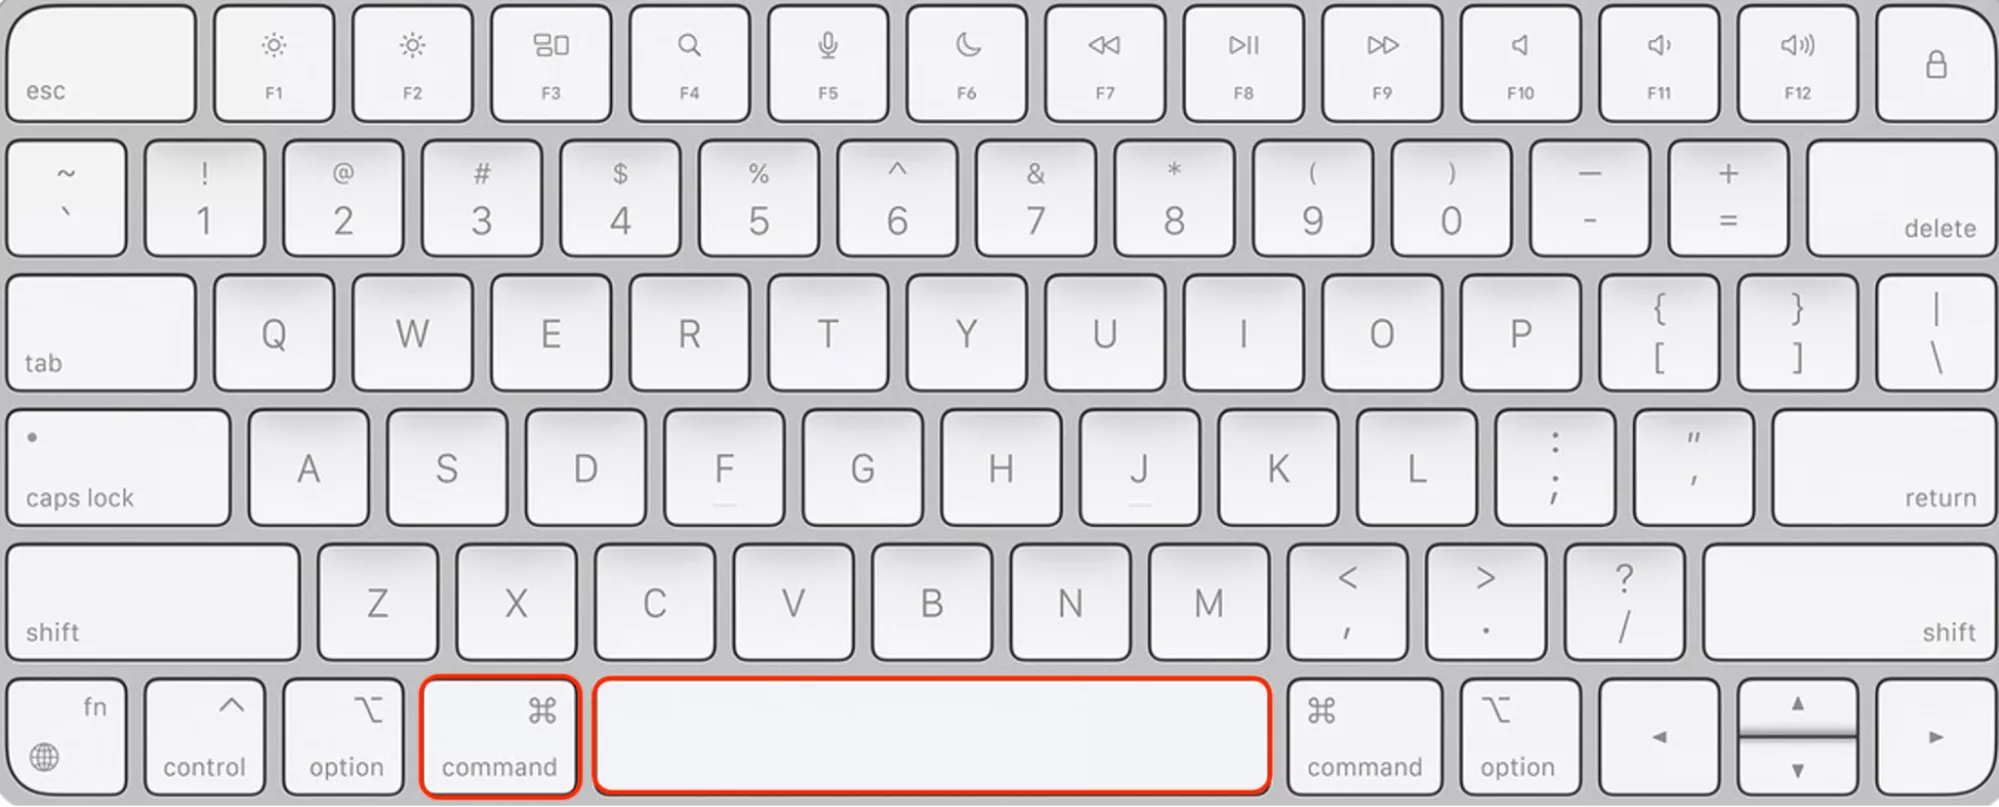
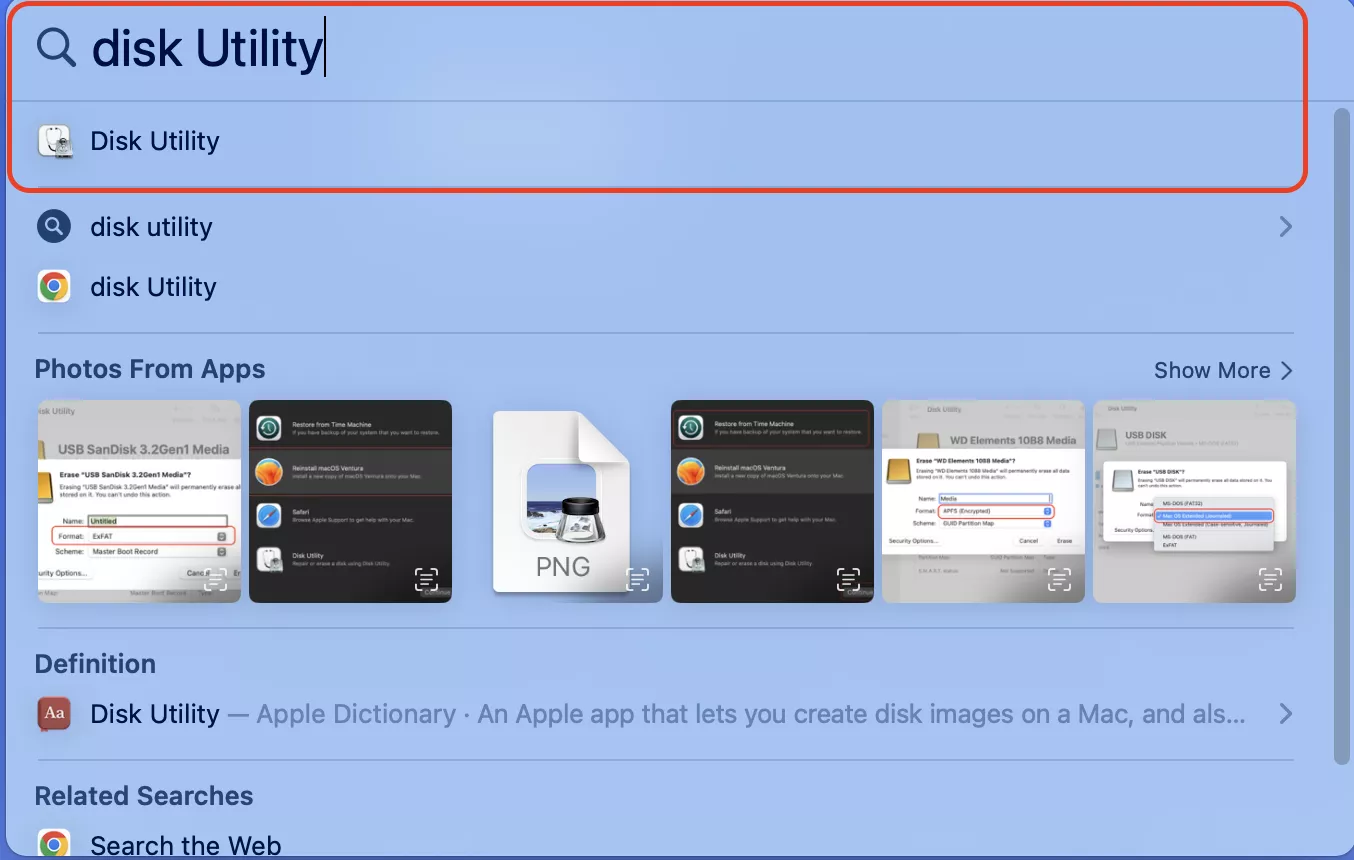
- Press the Cmd + Space bar keys, enter Disk Utility in the search bar, and hit Enter.
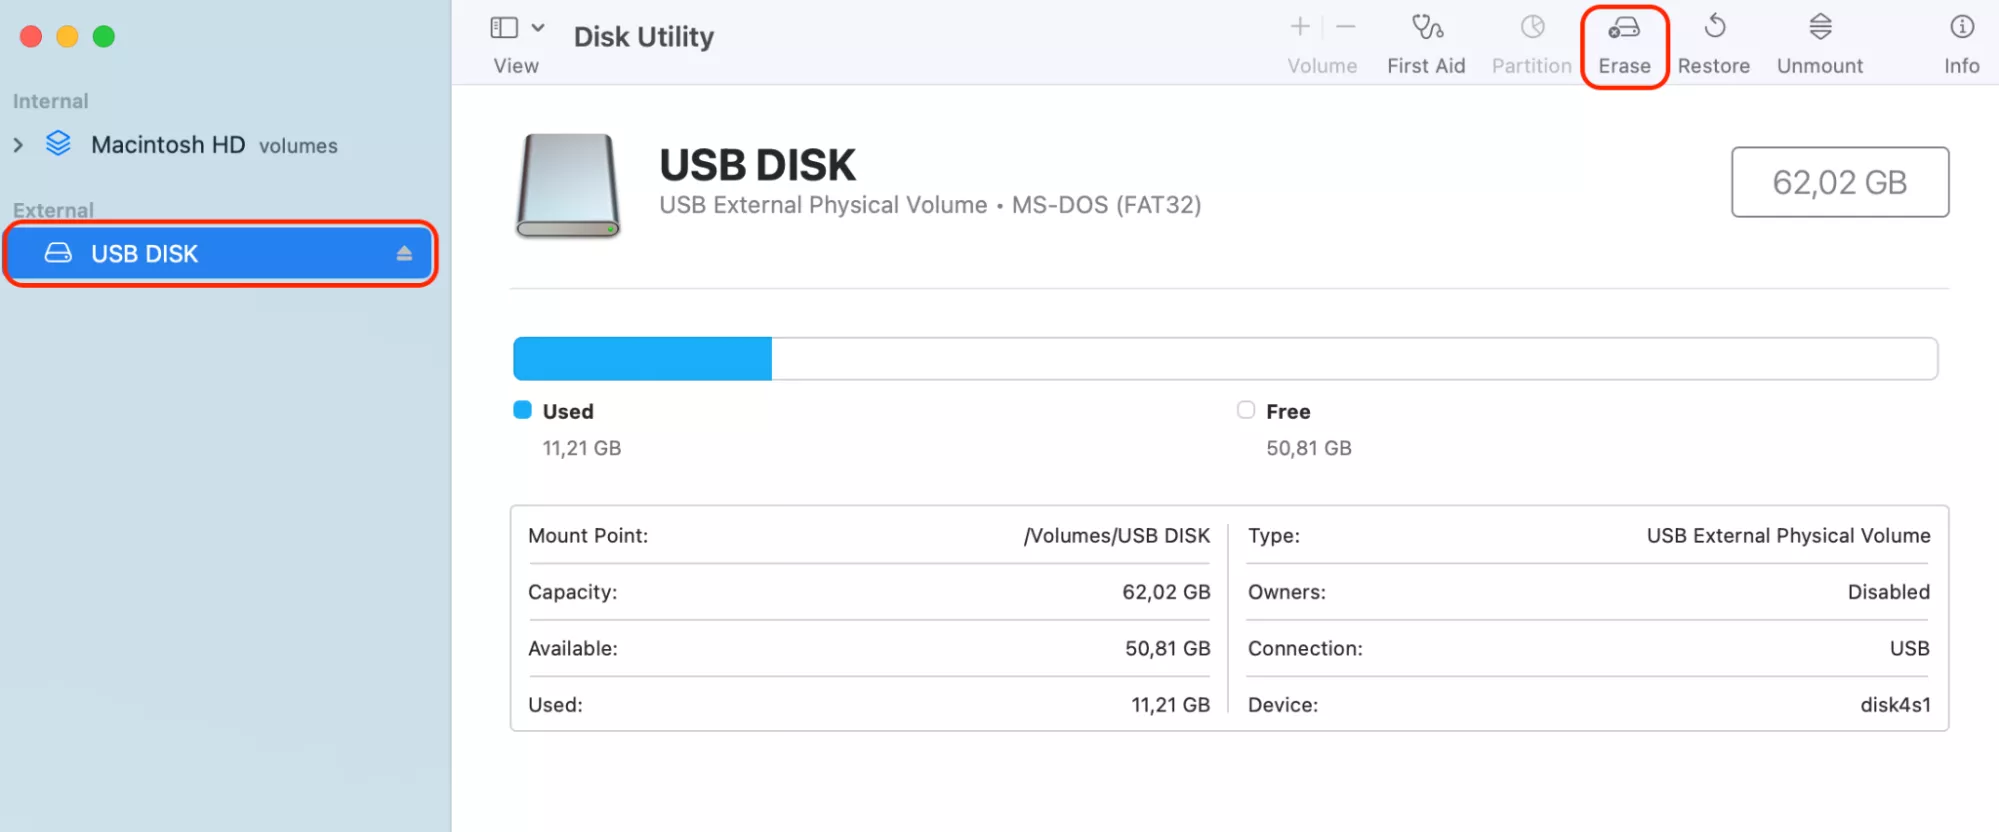
- Locate the name of your USB drive on the left side and double-click on it.
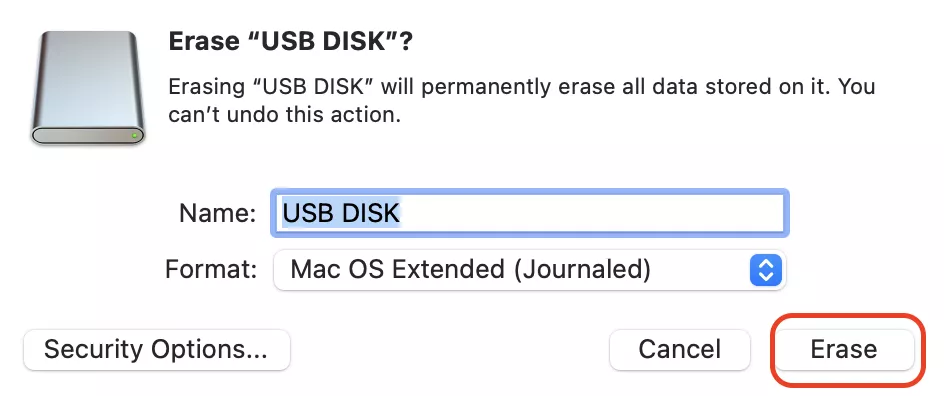
- Select the Erase option to commence the process of erasing the flash drive on your Mac.
Loading...“Turn it off and on again” has earned its place as a humorous catchphrase in the IT world, but the simplicity of restarting your Mac should not be underestimated. In fact, it often proves to be the most effective and straightforward solution for a multitude of problems, including the frustrating issue of a non-responsive flash drive.
2. Connect a flash drive to another USB port
If your thumb drive doesn’t show up on a Mac may be an issue related to the specific USB port you’re using. It might sound obvious, but your initial step should be trying the device in an alternative USB port available on your computer.
If the device works in the second port, it likely indicates that the first port may be damaged and may require replacement or repair. However, if the drive doesn’t function in any of your USB interfaces, you’ll need to investigate further to identify the problem.
3. Change Finder settings
Your Mac might actually recognise your USB flash drive without any issues, but it might not be visible due to changes in particular Finder settings. To rectify this, follow these steps:
After completing these steps, your USB flash drive should now appear as a location in Finder and as an icon on your Desktop.
4. Use First Aid to repair a flash drive
Mac computers and laptops come equipped with a valuable utility known as First Aid, and this feature can often be the key to resolving the issue of your USB stick not appearing as expected.
You can access First Aid through the built-in application known as Disk Utility, which is designed to manage and troubleshoot storage devices.
Here’s a more detailed explanation of how this feature can be your go-to solution:
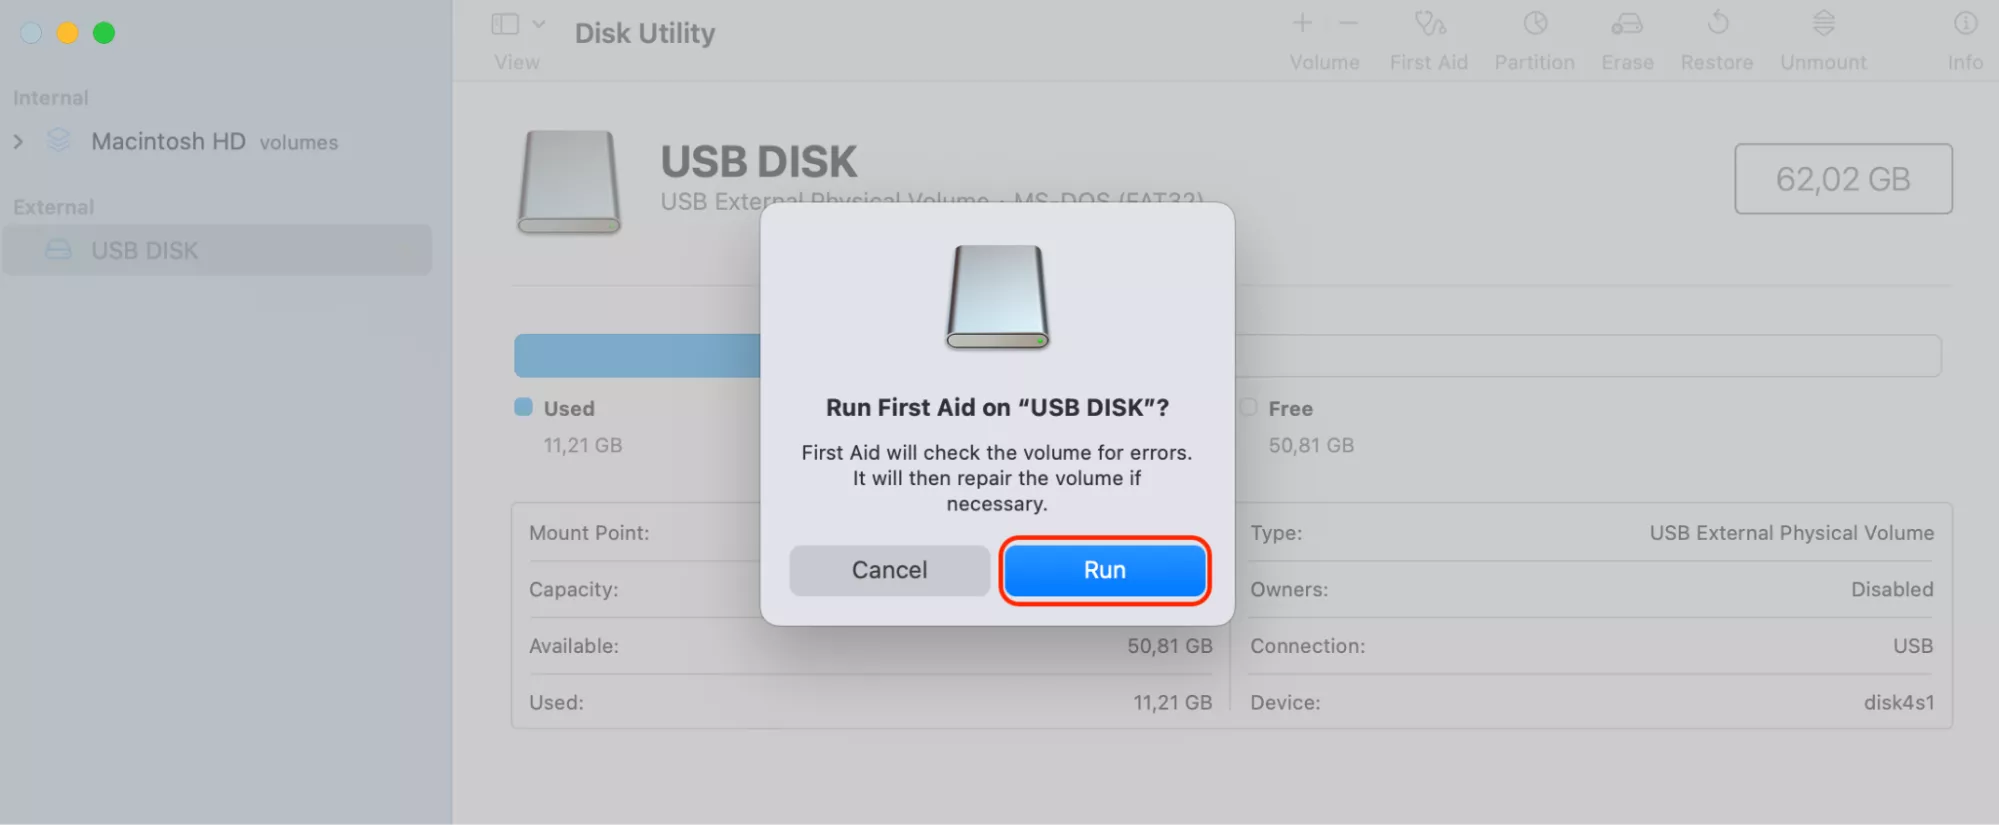
First Aid will repair errors and hopefully get your flash drive working again. If not, continue with our other solutions below.
5. Use the Terminal to fix the issue
Using Terminal to fix the flash drive is another potential solution. Here’s how:


6. Update macOS
The reason your flash drive may not be appearing on your Mac could be linked to an outdated macOS version, which lacks the necessary drivers or compatibility updates required to detect and manage newer hardware properly. In contrast, an up-to-date operating system ensures that your system recognizes and interacts effectively with external devices, like flash drives.
Here’s how to update your macOS:
Once the update is finished, and you’re logged back in, check to see if your flash drive is appearing on your desktop. If not, continue below.
7. Format the USB drive
Use Disk Utility on Mac to format your USB drive easily. To reset your USB on Mac:
Note from our team:
Formatting your flash drive will erase all files and data, so we advise not to do this unless the files are backed up elsewhere. At the same time, Disk Utility serves as the hub for managing external storage on Mac, making it the ideal tool for formatting your USB drive.
8. Send the USB drive to the repair center
When all the troubleshooting steps mentioned are unable to resolve the issue, it’s possible that the root cause lies in a hardware problem with your flash drive. In such cases, you likely need to contact the manufacturer or visit their official website for guidance on warranty coverage and repair services.
If your flash drive is still under warranty, the manufacturer may offer to repair or replace it at no cost to you. If the warranty has expired, they can provide you with information on repair options and associated costs.
We also recommend trying MacKeeper’s Premium Services, which will connect you with your own personal technical expert who will be happy to guide you through everything to get your Flash Drive working again, and any other tech issues you may have.
It’s also essential to back up any important data on the flash drive before sending it for repair or replacement to avoid data loss.
Sorted, in a flash
The convenience of USB drives is well-known, providing easy access to data on most modern computers. However, the frustration of a USB drive not appearing on your Mac can disrupt your workflow.
We’ve identified several potential causes for your USB drive not working on your Mac, including damaged USB ports, configuration settings, insufficient power, improper ejection, or outdated macOS.
By following our solutions, you can hopefully resolve the issue and regain access to your USB drive’s data on your Mac. Remember, you can also reach out to MacKeeper’s Premium Services to get professional technical support.
